
One of the most effective ways to interact with SharePoint programmatically is through REST APIs. This article will guide you through the basics of SharePoint REST APIs. The SharePoint REST API provides a flexible way to interact with SharePoint data and services. Using these APIs, you can perform CRUD operations on SharePoint objects such as lists, list items, and documents. This feature is mainly used when connecting SharePoint with other software like web apps, ERP solutions, etc.
Prerequisites:
Before you begin, ensure you have the following prerequisites:
- A SharePoint Online site
- Access to a SharePoint site collection
- Basic knowledge of HTTP methods (GET, POST, PUT, DELETE)
- Tools like Postman or any REST client for testing API requests
SharePoint Site
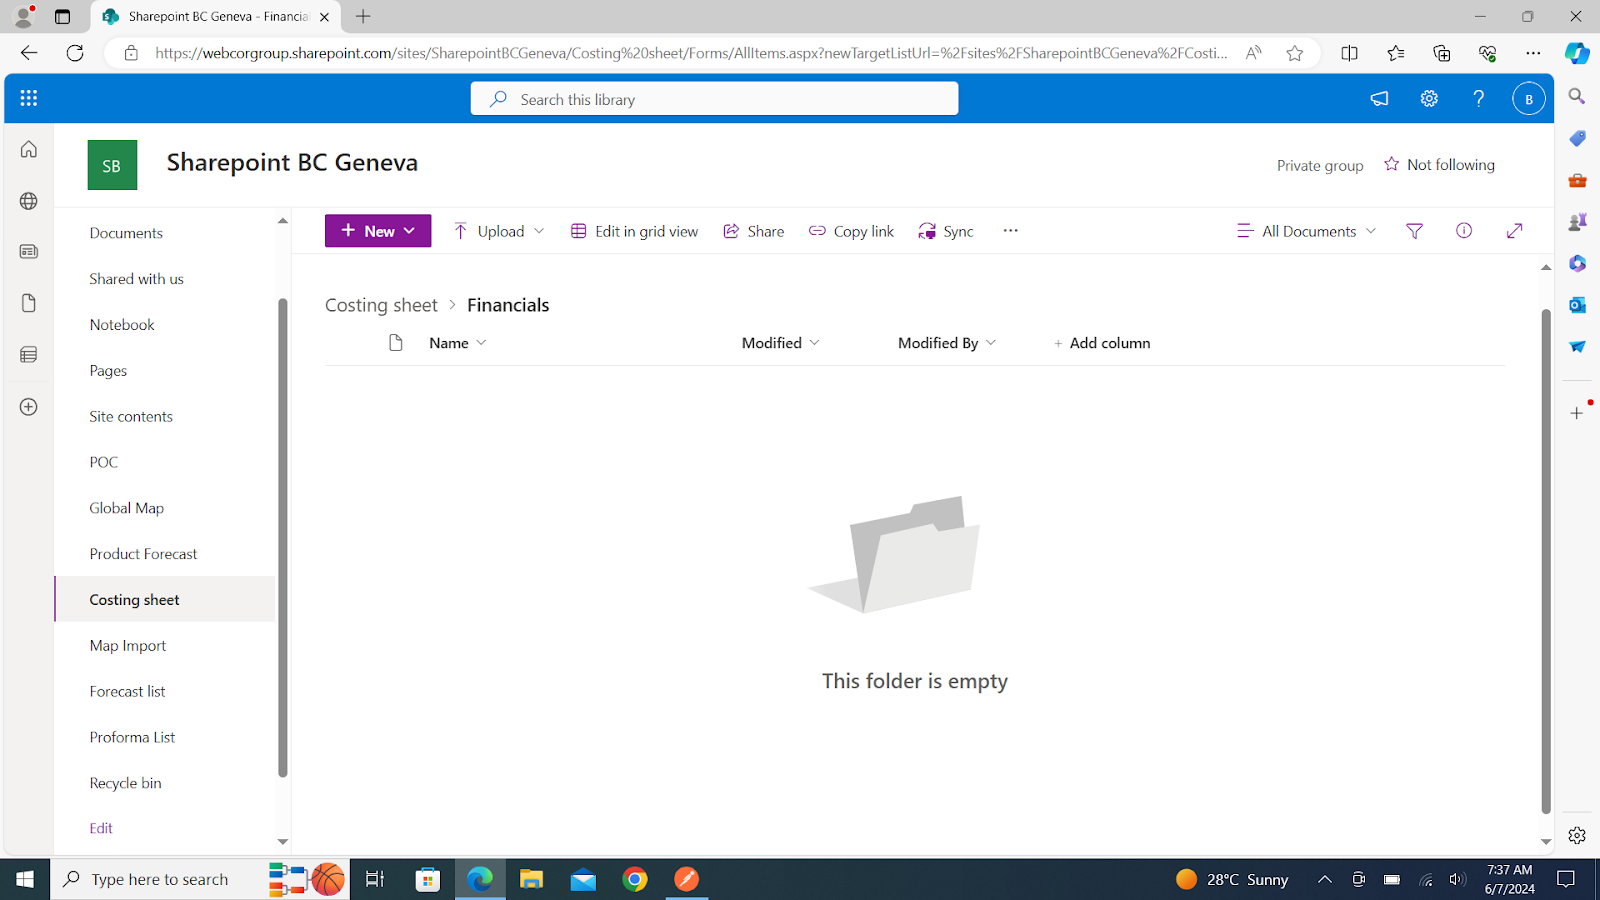
To begin with, we have a SharePoint Online site with a document library named 'Costing Sheet'. We want to upload and fetch documents from one of the folders in the given document library using REST APIs.

Registering app in SharePoint
To work with the SharePoint API, we first need to register an app in SharePoint. This involves generating a client id and client secret.
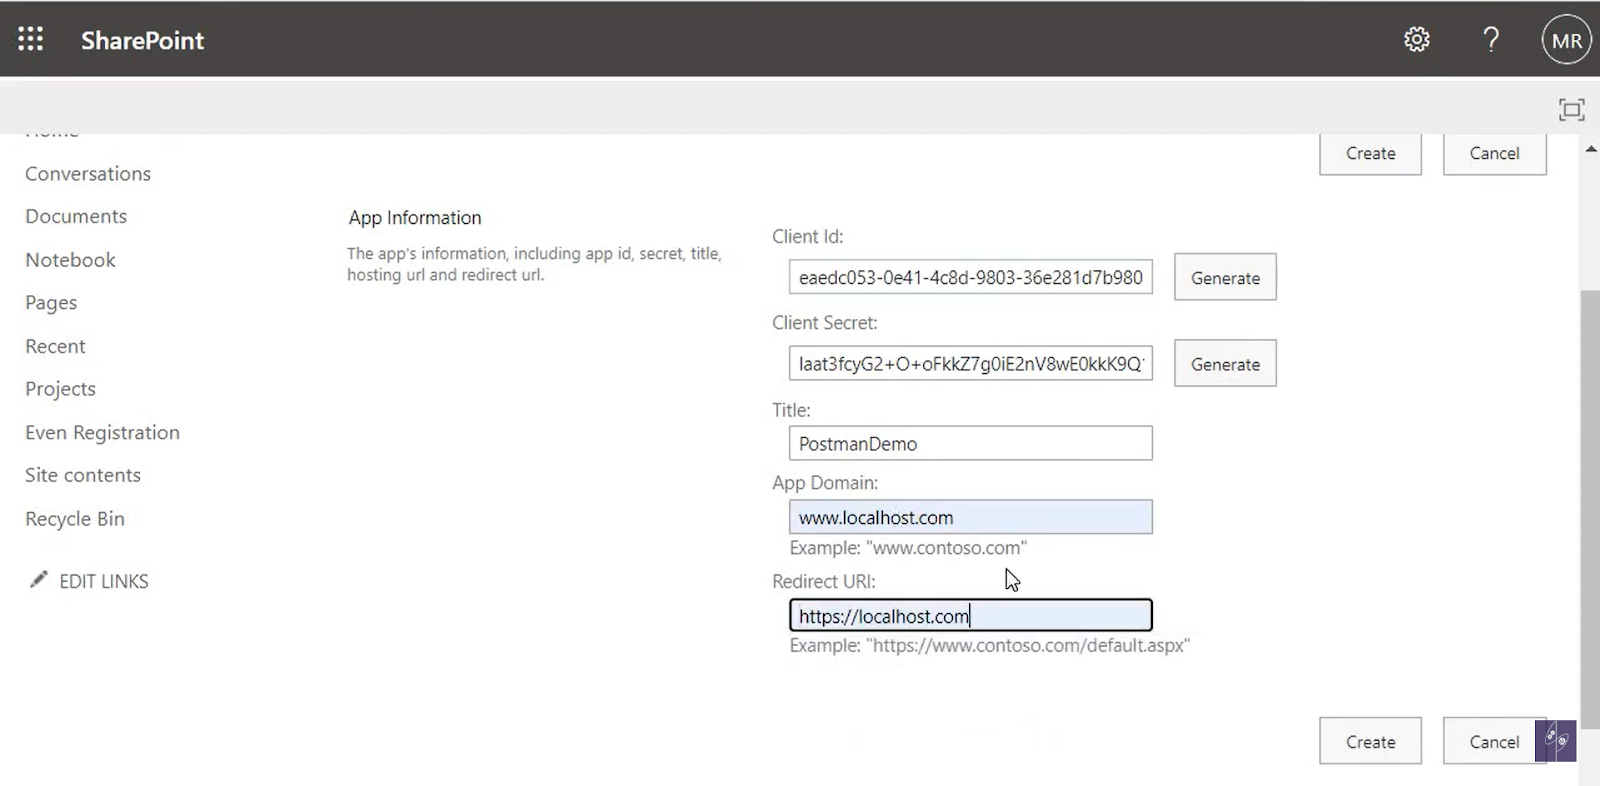
To register the app, we need to visit the following URL: {SharePoint_site_url}/_layouts/15/appregnew.aspx.
On this page, click on "Generate" to generate a new client id and client secret. We also need to specify that we'll be using this app with Postman and provide the redirect URL, which for the current case could be
http://localhost.com
and https://localhost.com.
Once we've filled out the form, we can click "Create" to complete the app registration.
Make sure to note down the client id and client secret, as we'll need these values later.
Authorizing app in SharePoint
Now that we've registered the app, we need to authorize it to access the SharePoint resources. We can do this by visiting the following URL: {SharePoint_site_url}/_layouts/15/appinv.aspx.
On this page, we'll need to paste the client id we generated earlier and click "Lookup". This will populate the form with the app details we specified during registration.
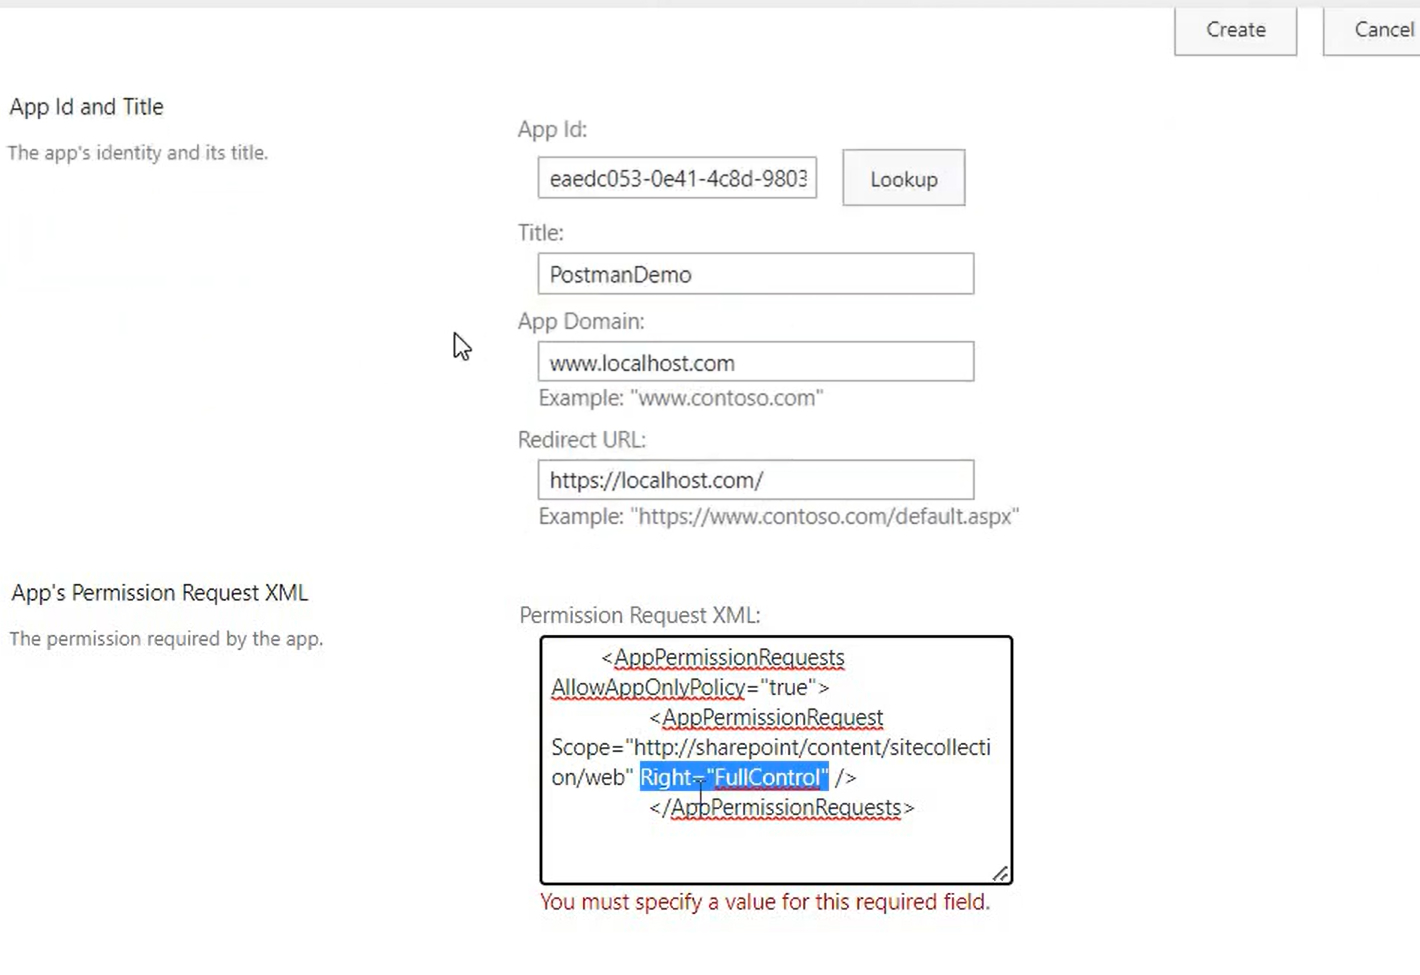
Next, we need to provide the app permissions xml. This xml specifies the permissions app will have when accessing SharePoint resources. Copy the following xml code and paste it into the "Permission request xml" field:
<AppPermissionRequests>
<AppPermissionRequest Scope="http://sharepoint/content/sitecollection/web" Right="FullControl" />
</AppPermissionRequests>
This xml grants the app full control over the SharePoint resources. Once we've added the xml, we can click "Create" to complete the app authorization process.
Requesting an access token
The final step is to request an access token that will be used to authenticate requests to the SharePoint API.
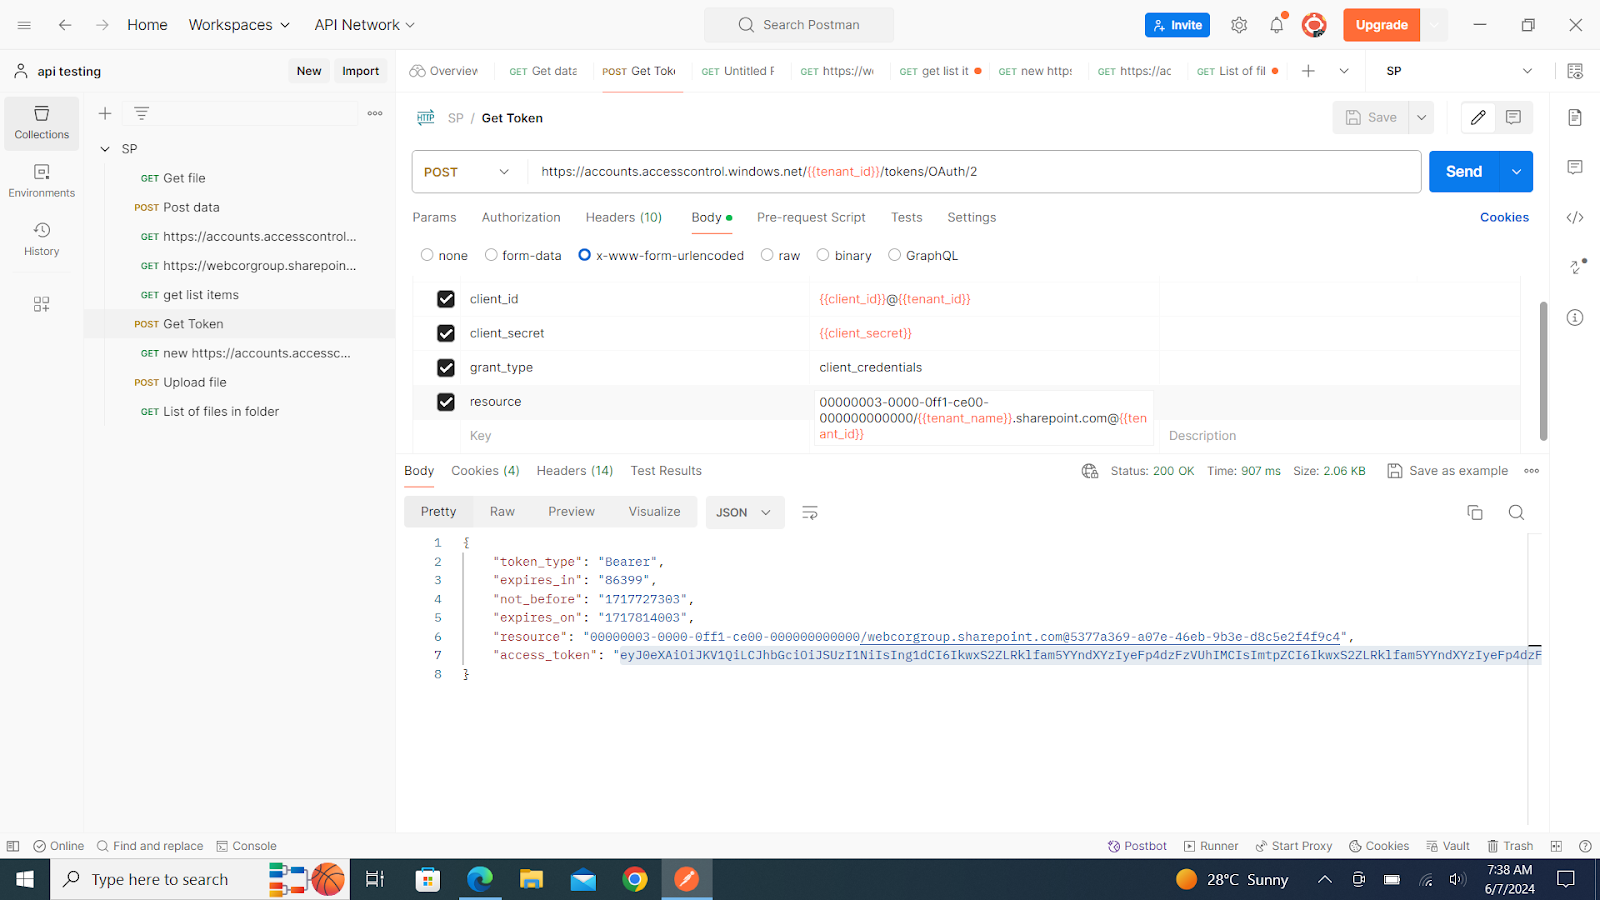
We can do this by sending a POST request to the following URL: https://accounts.accesscontrol.windows.net/{tenant_id}/tokens/oauth/2,
where {tenant_id} is the tenant id we retrieved in the previous step.
And, in the request body, we'll need to include the following form data:
- grant_type: client_credentials
- client_id: {client_id}@{tenant_id}
- client_secret: {client_secret
- resource: https://{tenant_id}.sharepoint.com
Once we send this request, Postman will return an access token that we will use in subsequent requests to the SharePoint API by placing the token in the authorization header.
The resource parameter in the OAuth request is used to specify the resource you are requesting access to. In the context of SharePoint Online, this resource is the SharePoint online service itself.
Here’s the parameter in question:
resource=00000003-0000-0ff1-ce00-000000000000/{tenant_name}.sharepoint.com@{tenant_id}
Let’s break it down:
-
00000003-0000-0ff1-ce00-000000000000:
This is the fixed identifier (also known as the principal id) for the SharePoint Online service in Azure Active Directory (Azure AD). This GUID is specific to SharePoint online and is used universally to identify it. -
{tenant_name}.sharepoint.com:
This part represents the SharePoint online service's specific endpoint for your tenant. Replace {tenant_name} with the actual name of your SharePoint online tenant (typically the first part of your SharePoint online url). For example, if your SharePoint url is https://contoso.sharepoint.com, then {tenant_name} would be contoso. -
@{tenant_id}:
This is the unique identifier (tenant id) for your Azure AD tenant. This GUID is specific to your Azure AD instance. You can also find your tenant id in the Azure AD portal.
When you request an OAuth token, you need to specify the exact resource you want to access. In this case, you are requesting access to the SharePoint online service for your specific tenant. The combination of the SharePoint online principal id, your tenant name, and your tenant id uniquely identifies the SharePoint online service instance you want to access.
Upload file
As we have an access token, This is used in further api calls in authorization header as follows:
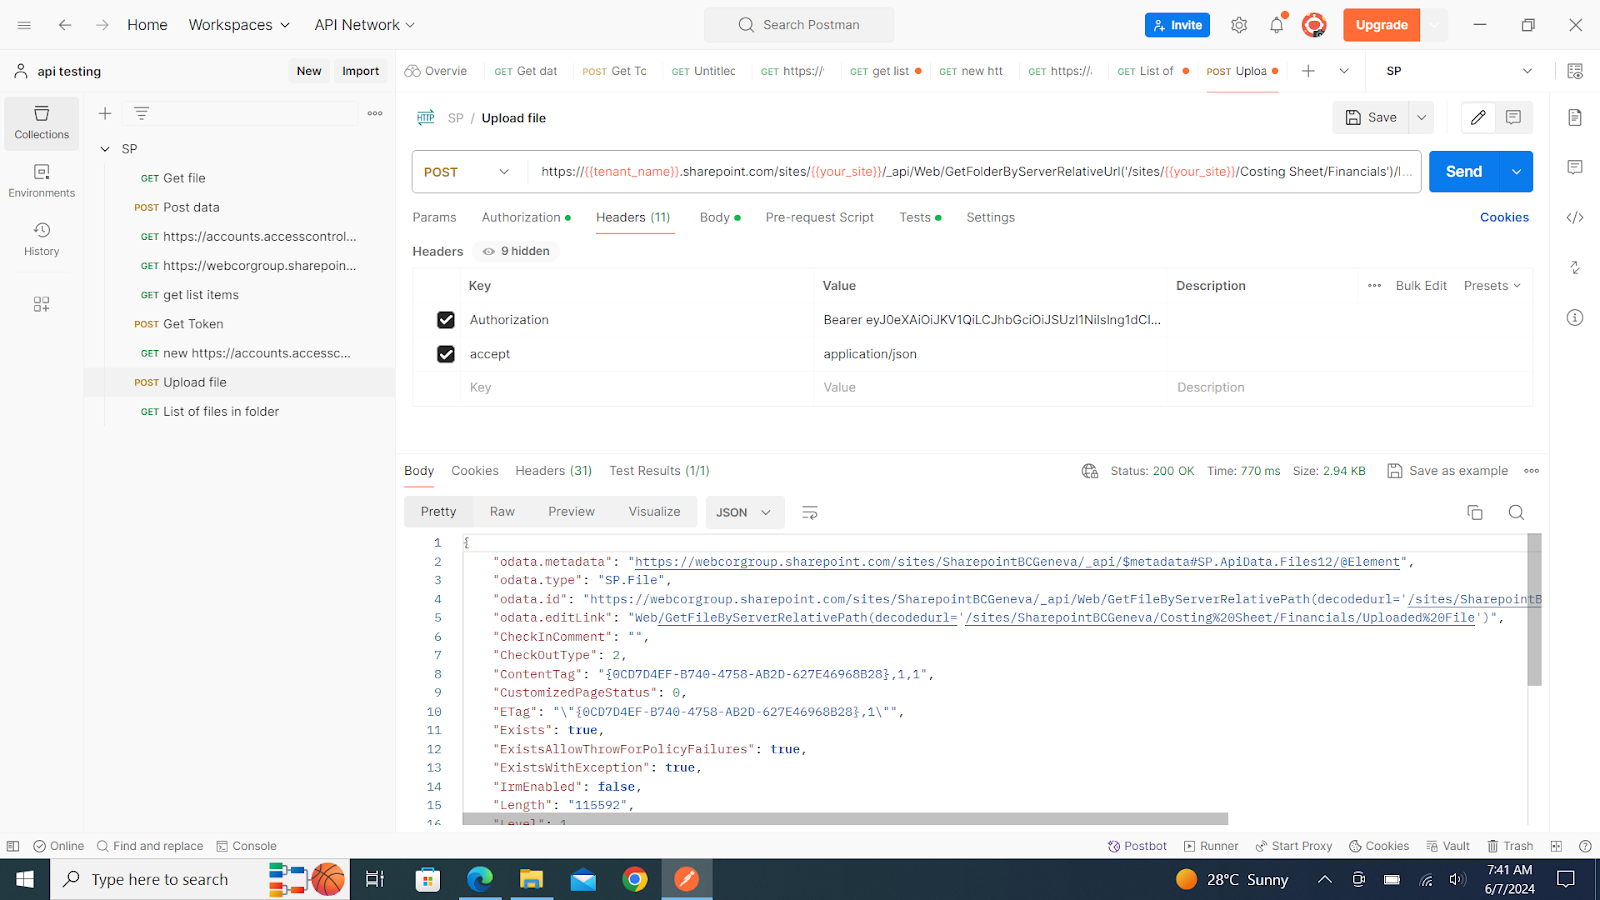
First in order to upload a file in our required folder of document library in sharepoint site we will use following api:
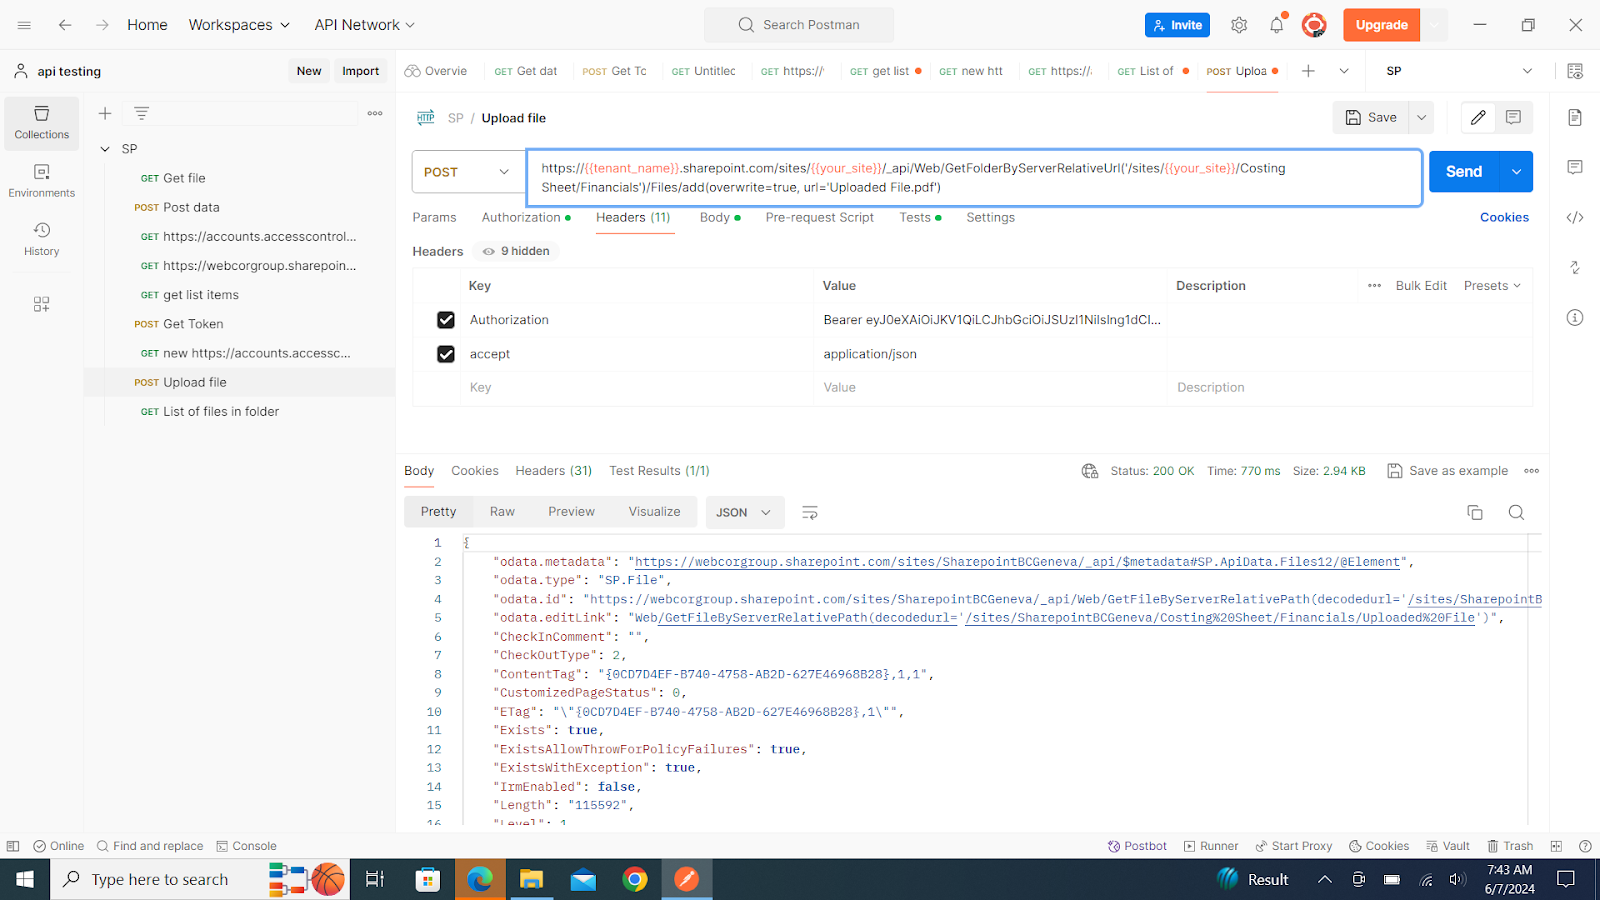
In the above api, this url is according to SharePoint api specifications. You specify the folder path where you want to upload the file and set the options to write the file with the given name.
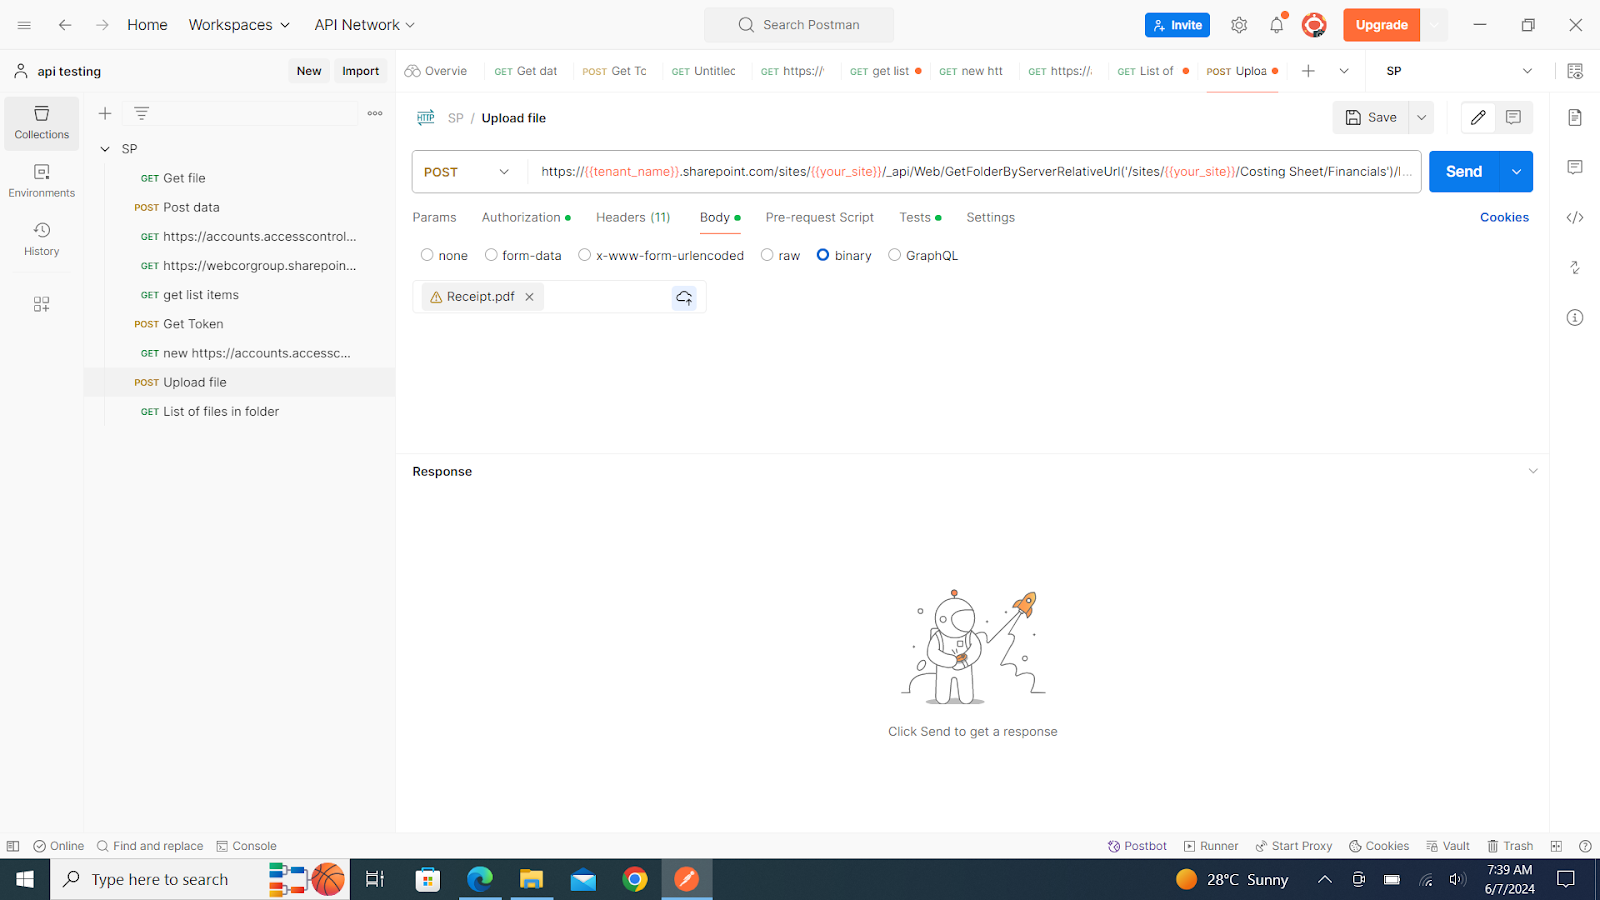
Thus, to select the file to upload from our computer, we choose the binary option in Postman, browse for the file on the local computer, and then click the 'Send' button to upload the file.

As shown in the picture above, the file we uploaded from Postman will appear in the SharePoint folder which path we specified in the api url.
Download file
Now in order to download the file uploaded to SharePoint we need to call the following api:
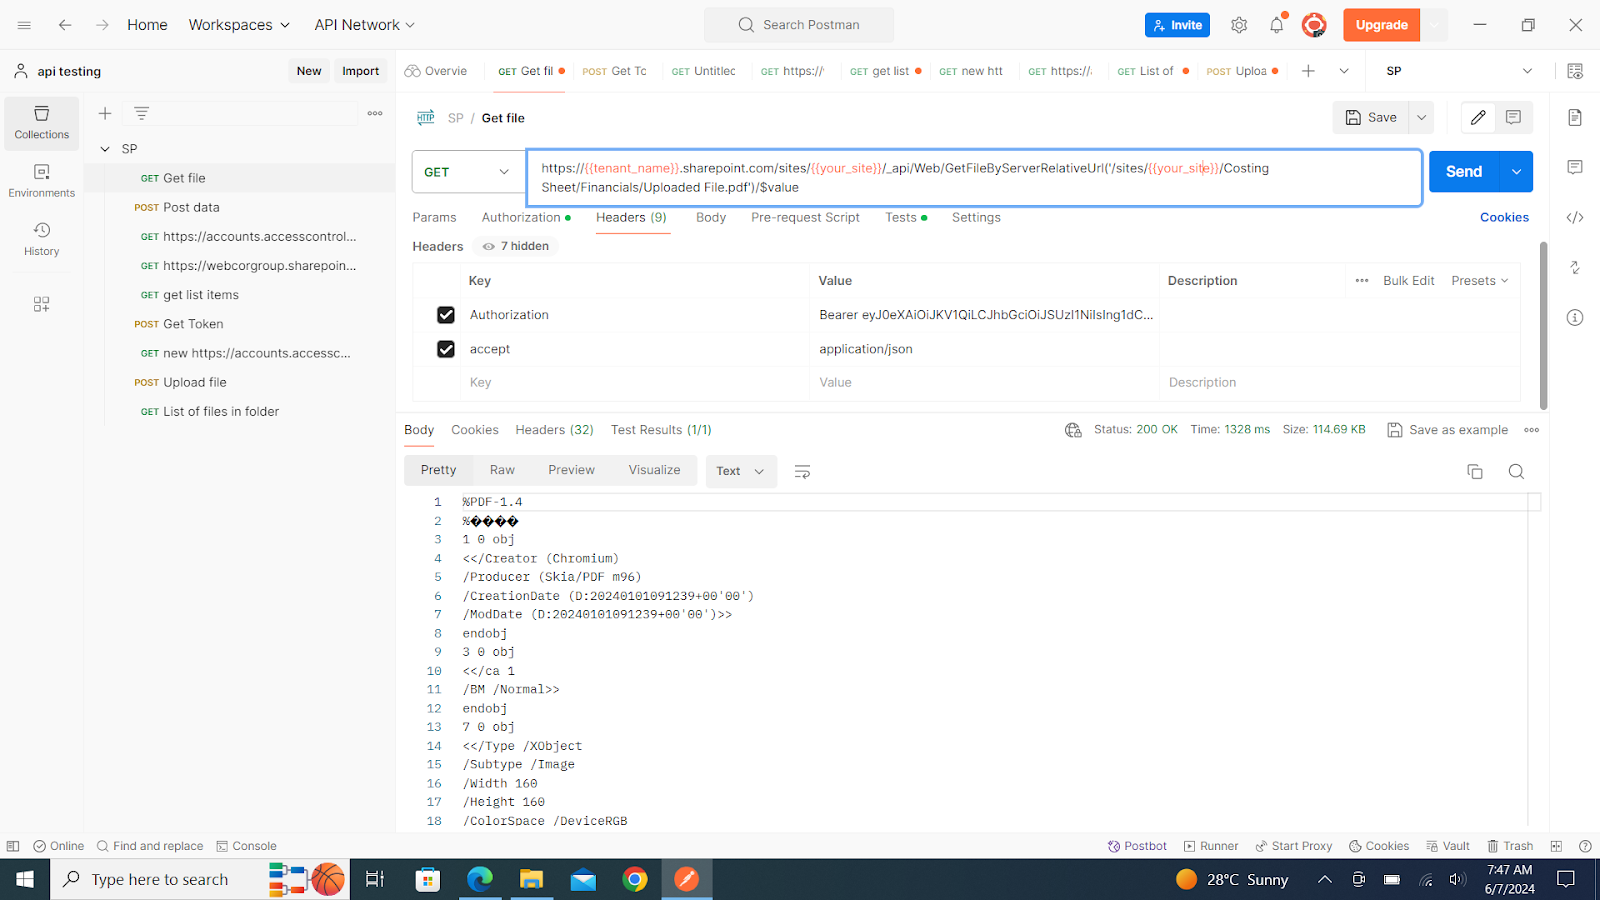
In this case, the url will be almost same as the one we used for uploading a file. However, instead of setting the option to write a file, we will write ‘$value’ in the url to download the file. The api will return the specified file in response.
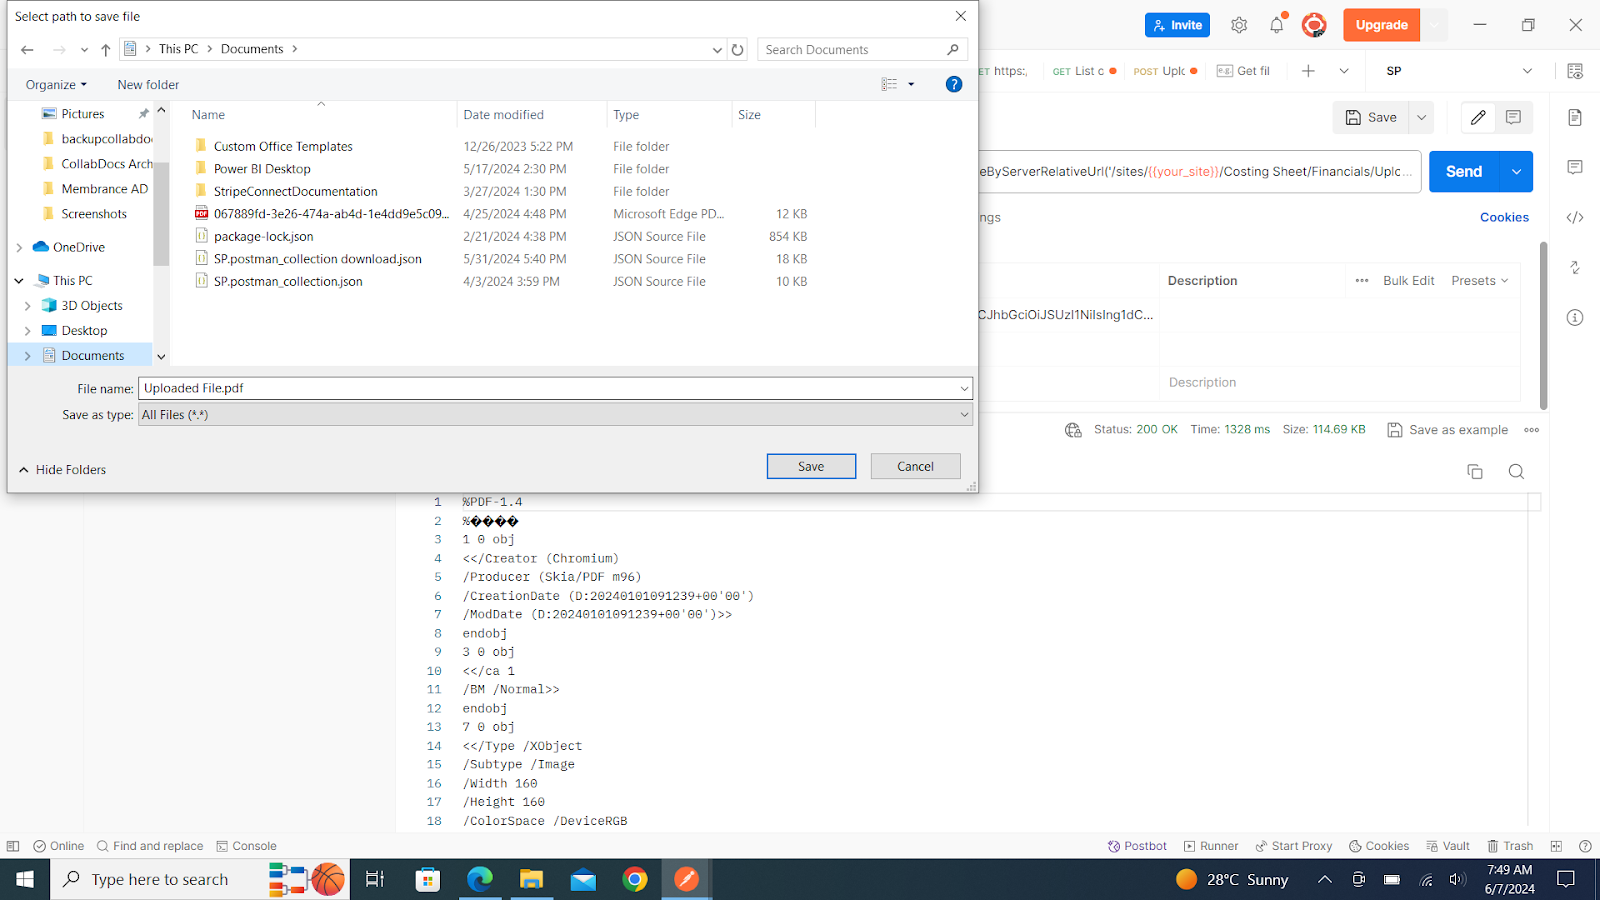
Now, click on save as option to save the file in any directory on the computer.
Conclusion
Thus by utilizing the Rest api, you can automate tasks, integrate SharePoint with other applications, and create more dynamic and efficient workflows, and deliver exceptional SharePoint solutions to your clients and users.


0 Comments